Taking a screenshot on Mac is one of the most essential skills every MacBook and iMac user should know. Whether you want to capture your entire screen, a specific area, or just a single window — macOS gives you multiple built-in methods to take screenshots without installing any third-party software.
In this complete guide, we'll show you 5 easy methods to take screenshots on Mac, including keyboard shortcuts, the Screenshot toolbar, and how to change your screenshot save location. Let's get started!
Why You Need to Know How to Screenshot on Mac
Screenshots are incredibly useful for many everyday tasks:
- Save important information from websites, emails, or documents
- Share error messages with tech support for troubleshooting
- Create tutorials and how-to guides with visual references
- Capture receipts and confirmation pages for online purchases
- Save social media content before it disappears
Now let's dive into all the methods you can use to capture your Mac screen.
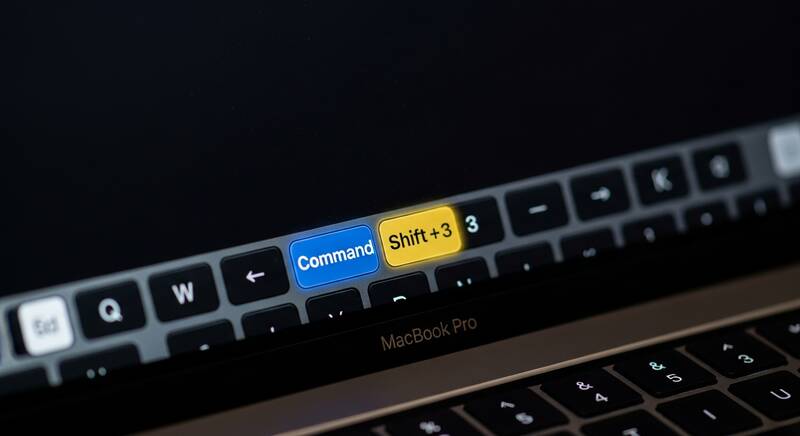
Method 1: Capture Entire Screen (Command + Shift + 3)

The quickest way to take a full screen screenshot on Mac is by pressing:
Command (⌘) + Shift + 3
This keyboard shortcut captures everything currently visible on your display. Here's what happens:
- Press and hold the Command (⌘) key
- While holding Command, press Shift
- While holding both keys, press the 3 key
- You'll hear a camera shutter sound (if your sound is on)
- A small thumbnail preview appears in the bottom-right corner of your screen
- The screenshot is automatically saved to your Desktop
Pro Tip: If you have multiple monitors connected, this shortcut will capture each display as a separate screenshot file.
Method 2: Capture a Selected Area (Command + Shift + 4)

Want to capture only a specific portion of your screen? Use this shortcut:
Command (⌘) + Shift + 4
After pressing this keyboard combination:
- Your cursor will change to a crosshair (+) icon
- Click and drag to select the area you want to capture
- You'll see the pixel dimensions as you drag
- Release the mouse button to take the screenshot
- The selected area is captured and saved to your Desktop
Helpful Tips for Selected Area Screenshots:
- Press Escape to cancel the screenshot before releasing the mouse
- Hold Space bar while dragging to move the entire selection area
- Hold Shift while dragging to lock one dimension (height or width)
- Hold Option (⌥) while dragging to resize from the center
Method 3: Capture a Single Window (Command + Shift + 4 + Space)

To take a clean screenshot of a single window with a professional drop shadow effect:
Command (⌘) + Shift + 4, then press Space Bar
- Press Command + Shift + 4 (crosshair appears)
- Now press the Space Bar
- The crosshair changes to a camera icon
- Hover over the window you want to capture — it will be highlighted in blue
- Click on the window to capture it
This method captures the window with a beautiful drop shadow effect, making it look professional and clean. It works with any open window, dialog box, or even the Dock and menu bar.
Pro Tip: Hold Option (⌥) while clicking to capture the window without the shadow effect.
Method 4: Use the Screenshot Toolbar (Command + Shift + 5)

macOS Mojave and later versions include a powerful Screenshot Toolbar that gives you the most control over your screen captures:
Command (⌘) + Shift + 5
The Screenshot Toolbar appears at the bottom of your screen with these options:
- Capture Entire Screen — Same as Command + Shift + 3
- Capture Selected Window — Same as Command + Shift + 4 + Space
- Capture Selected Portion — Same as Command + Shift + 4
- Record Entire Screen — Start a full screen video recording
- Record Selected Portion — Record a specific area of your screen
Screenshot Toolbar Options (Click "Options"):
- Save to: Desktop, Documents, Clipboard, Mail, Messages, Preview, or a custom folder
- Timer: None, 5 seconds, or 10 seconds delay
- Show Floating Thumbnail: Enable or disable the preview thumbnail
- Remember Last Selection: Keeps your previous capture area
- Show Mouse Pointer: Include or exclude the cursor in screenshots
Method 5: Screenshot to Clipboard (Add Control Key)
Sometimes you want to paste a screenshot directly into an app like Pages, Keynote, Slack, or an email — without saving a file to your Desktop. Simply add the Control (⌃) key to any screenshot shortcut:
- Control + Command + Shift + 3 — Full screen to clipboard
- Control + Command + Shift + 4 — Selected area to clipboard
- Control + Command + Shift + 4 + Space — Window to clipboard
Then press Command + V to paste the screenshot anywhere you need it.
Where Are Mac Screenshots Saved?

By default, all screenshots on Mac are saved to your Desktop with the naming format:
Screenshot [date] at [time].png
How to Change Screenshot Save Location
If your Desktop gets cluttered with screenshots, you can easily change the save location:
- Press Command + Shift + 5 to open the Screenshot Toolbar
- Click "Options"
- Under "Save to", choose a different location:
- Desktop
- Documents
- Clipboard
- Messages
- Preview
- Other Location... (choose any custom folder)
Pro Tip: Create a dedicated "Screenshots" folder in your Documents or Pictures directory to keep things organized.
How to Change Screenshot File Format on Mac
By default, Mac saves screenshots in PNG format. You can change this to JPG, PDF, TIFF, or GIF using Terminal:
- Open Terminal (Applications → Utilities → Terminal)
- Type the following command and press Enter:
defaults write com.apple.screencapture type jpgReplace jpg with your preferred format: png, pdf, tiff, or gif
- Restart the screenshot service by typing:
killall SystemUIServerQuick Reference: All Mac Screenshot Shortcuts
Here's a handy table of all Mac screenshot keyboard shortcuts for quick reference:
| Shortcut | Action |
|---|---|
| ⌘ + Shift + 3 | Full screen screenshot (save to file) |
| ⌘ + Shift + 4 | Selected area screenshot |
| ⌘ + Shift + 4 + Space | Single window screenshot |
| ⌘ + Shift + 5 | Open Screenshot Toolbar |
| ⌃ + ⌘ + Shift + 3 | Full screen to clipboard |
| ⌃ + ⌘ + Shift + 4 | Selected area to clipboard |
| Escape | Cancel screenshot |
Troubleshooting: Mac Screenshot Not Working?
If your Mac screenshot shortcuts are not working, try these solutions:
- Check Keyboard Shortcuts: Go to System Preferences → Keyboard → Shortcuts → Screenshots and make sure all shortcuts are enabled
- Restart your Mac: A simple restart often fixes keyboard shortcut issues
- Check available storage: Screenshots won't save if your disk is full
- Reset NVRAM: Shut down your Mac, then turn it on and immediately hold Option + Command + P + R for 20 seconds
- Safe Mode: Restart in Safe Mode to check if third-party software is interfering
Frequently Asked Questions (FAQ)
How do I screenshot on Mac without keyboard?
Open Finder → Applications → Utilities → Screenshot app. You can also use Spotlight Search (Command + Space) and type "Screenshot" to open the app directly.
Can I take a scrolling screenshot on Mac?
macOS does not have a built-in scrolling screenshot feature. However, you can use free third-party apps like Shottr or CleanShot X for scrolling captures.
How to screenshot on Mac and paste it directly?
Add the Control (⌃) key to any screenshot shortcut. For example, Control + Command + Shift + 4 lets you select an area and copy it to clipboard. Then press Command + V to paste.
What format are Mac screenshots?
By default, Mac screenshots are saved in PNG format. You can change this to JPG, PDF, GIF, or TIFF using the Terminal command mentioned above.
Conclusion
Now you know all 5 methods to take screenshots on Mac! Whether you prefer the quick Command + Shift + 3 for a full screen capture or the powerful Screenshot Toolbar (Command + Shift + 5) for more control — macOS makes it incredibly easy to capture anything on your screen.
Bookmark this guide for quick reference whenever you need to take a screenshot on your MacBook Air, MacBook Pro, iMac, or Mac Mini. If you found this guide helpful, share it with your friends and family who are new to Mac!